Black Magic Probe from a Blue Pill
This chapter describes the process of making a Black Magic Probe from a Blue Pill board. The steps were tested on Ubuntu 18.04.3 LTS and Arch Linux 5.3.7.
Preparation
The process requires the following packages to be installed:
$ sudo apt install build-essential \
                   curl \
                   dfu-util \
                   gcc-arm-none-eabi \
                   gdb-multiarch \
                   git \
                   python \
                   python-pip
or on Arch Linux:
$ sudo pacman -S curl \
                 dfu-util \
                 git \
                 python \
                 python-pip
$ yaourt -S arm-none-eabi-gcc \
            gdb-multiarch
It is convenient to join the dialout group. This way you will not need
super-user privileges to work with BMP and USB-to-UART adapter:
$ sudo adduser $(id -un) dialout
or the uucp group on Arch Linux:
$ sudo gpasswd -a $(id -un) uucp
In order for the group change to take effect, you will need to re-login.
Get the stm32loader script and install its python dependencies:
$ git clone https://github.com/jsnyder/stm32loader
$ pip install pyserial
Get the BMP firmware:
$ git clone https://github.com/blacksphere/blackmagic
$ cd blackmagic
$ git submodule update --init --recursive
BMP repository provides udev rules for the probe. The rules instruct udev to
symlink the GDB endpoint to /dev/ttyBmpGdb and the UART to
/dev/ttyBmpTarg. Also they allow to upgrade BMP firmware without super-user
permissions.
$ sudo cp driver/99-blackmagic.rules /etc/udev/rules.d/
$ sudo udevadm control --reload-rules
Building
Correct probe host should be selected. In our case it's swlink.
$ make PROBE_HOST=swlink

This will produce two binaries we are interested in: src/blackmagic_dfu.bin
and src/blackmagic.bin. The first is a bootloader, which will be flashed with
the USB-to-UART adapter. And the second is the actual firmware, which will be
loaded through USB with help of the bootloader.
Flashing Bootloader
-
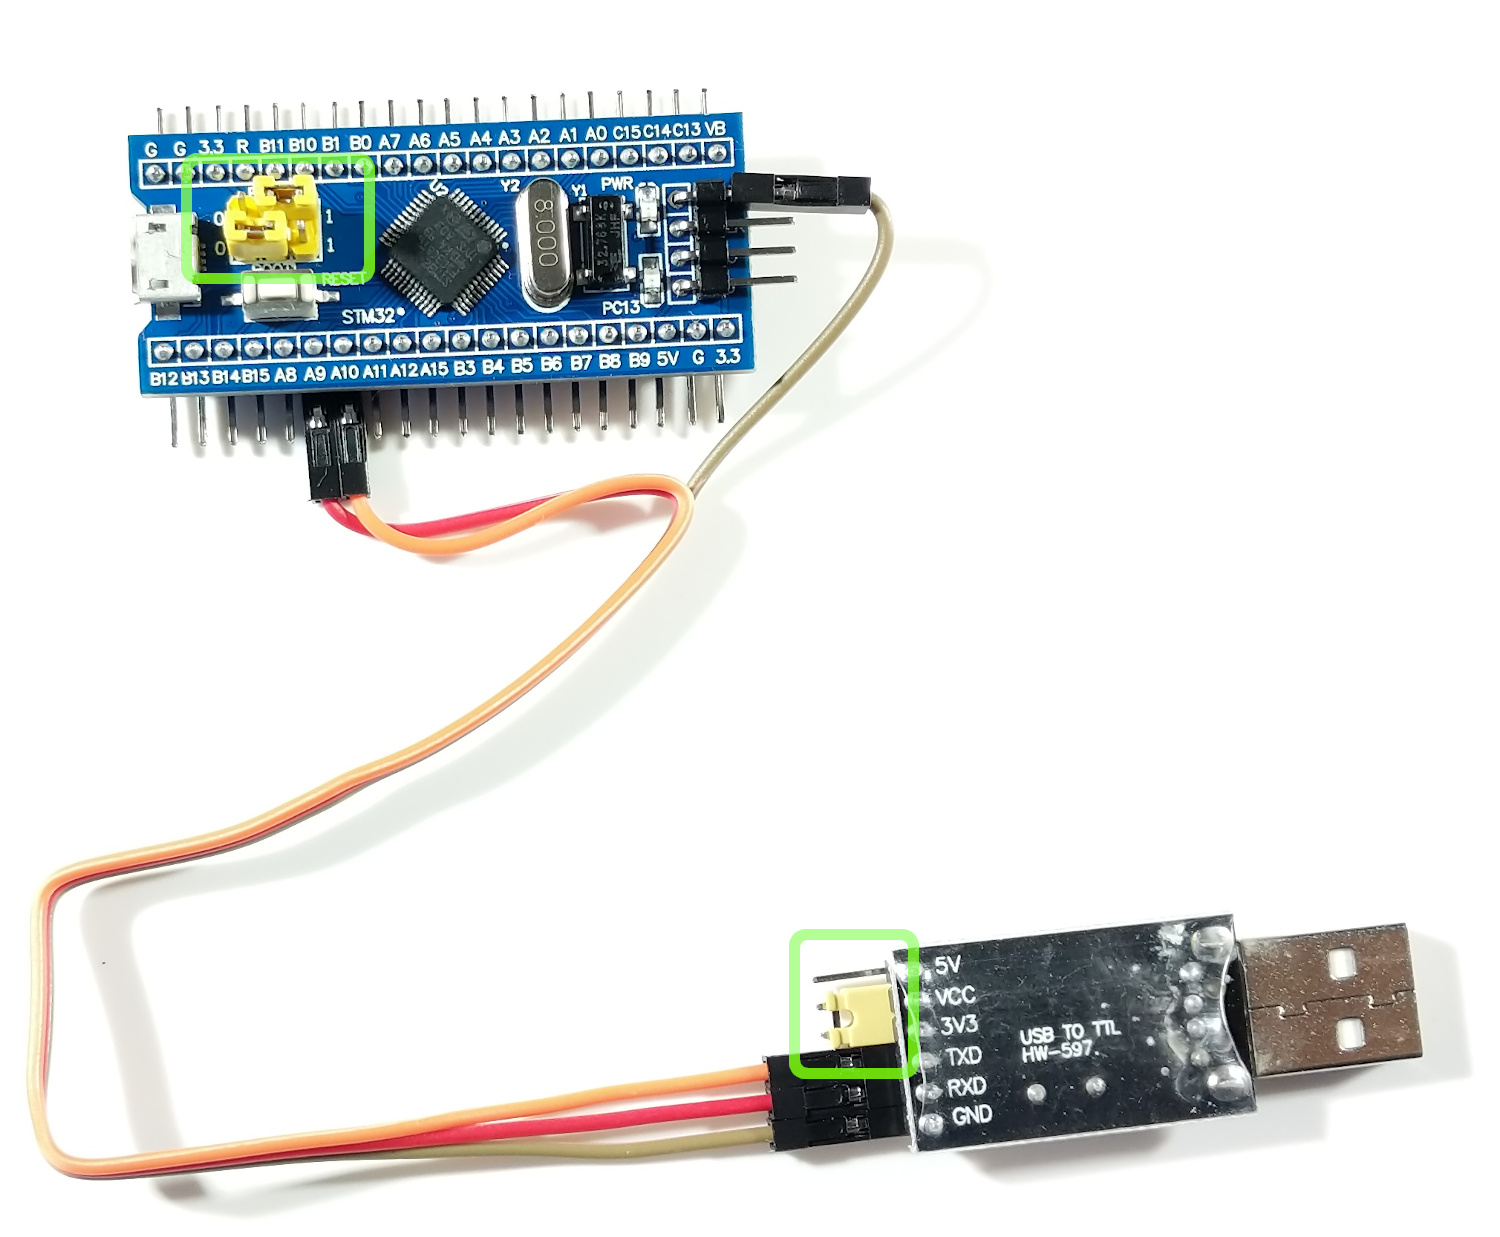
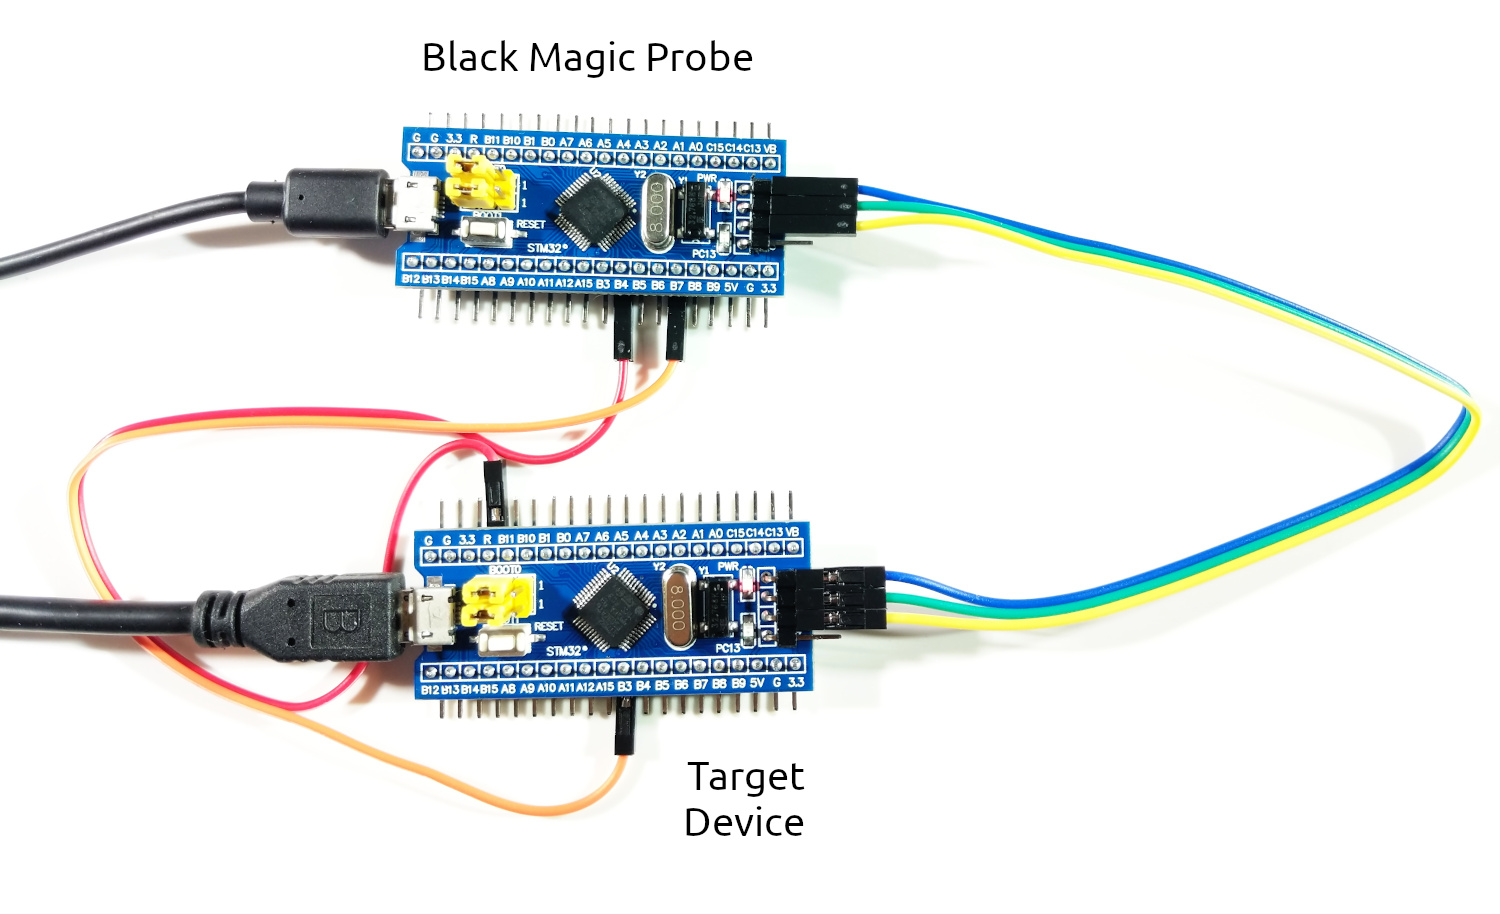
Connect the USB-to-UART adapter with the Blue Pill according to this table:
USB-to-UART Blue Pill GND GND RXD A9 TXD A10 Warning: Don't connect any power source now. We will power up the board through USB at the step 5. Using USB together with 5V or 3.3 pins can damage your board.
-
Set the jumper on the USB-to-UART adapter to the position where VCC and 3V3 are shorted. This will set the adapter's output voltage to 3.3 v. Although it is not strictly needed, because A9 and A10 pins are five-volt-tolerant.
-
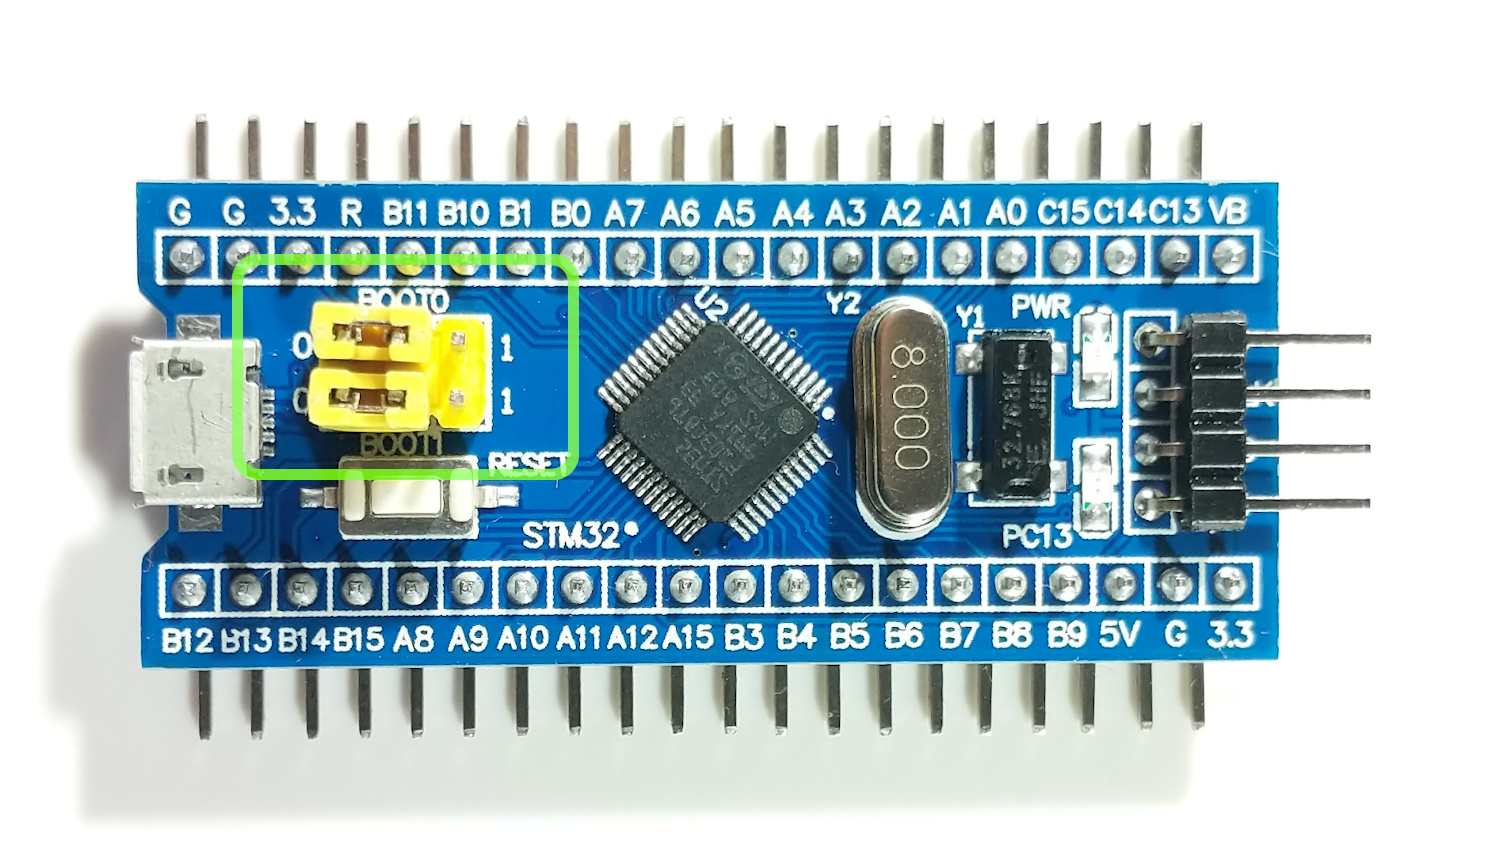
Set BOOT0 jumper on the Blue Pill to 1 to boot into the factory programmed bootloader. The bootloader is responsible for programming the board through UART.
-
Before connecting the USB-to-UART adapter to your PC, open the system journal:
$ journalctl -fConnect the USB-to-UART adapter and notice the name it is assigned:
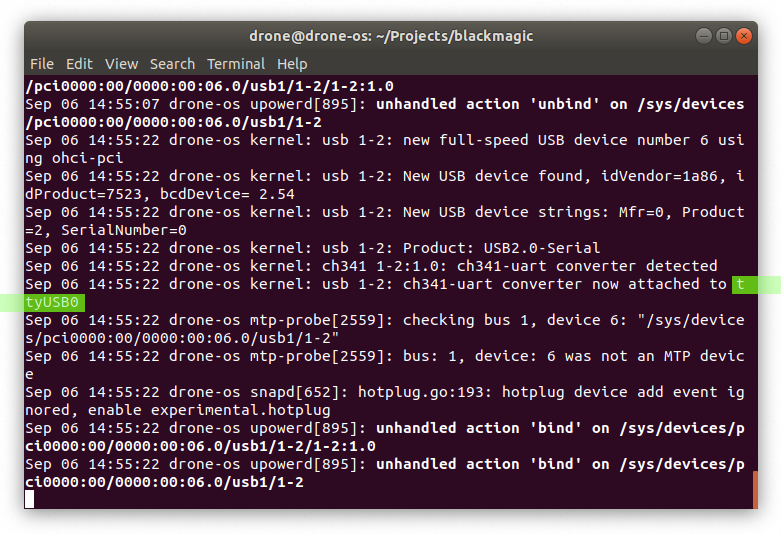
-
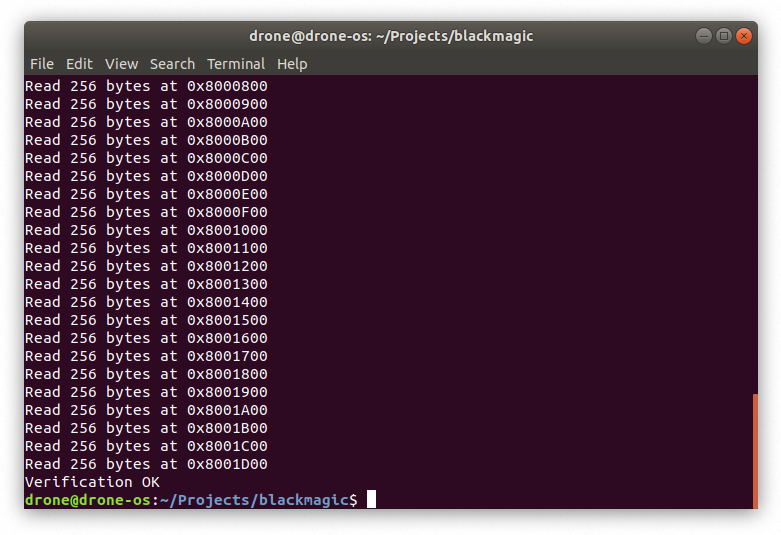
Connect a USB-cable to the Blue Pill and start the flashing process. Replace
/dev/ttyUSB0with your value from the previous step. If the process is not starting, press the reset button on the Blue Pill.$ ../stm32loader/stm32loader.py -p /dev/ttyUSB0 -e -w -v src/blackmagic_dfu.bin
- Set BOOT0 jumper on the Blue Pill back to 0.
Flashing Firmware
Now you can disconnect the USB-to-UART adapter from the Blue Pill and your PC. The firmware will be flashed through USB port:
$ dfu-util -d 1d50:6018,:6017 -s 0x08002000:leave -D src/blackmagic.bin
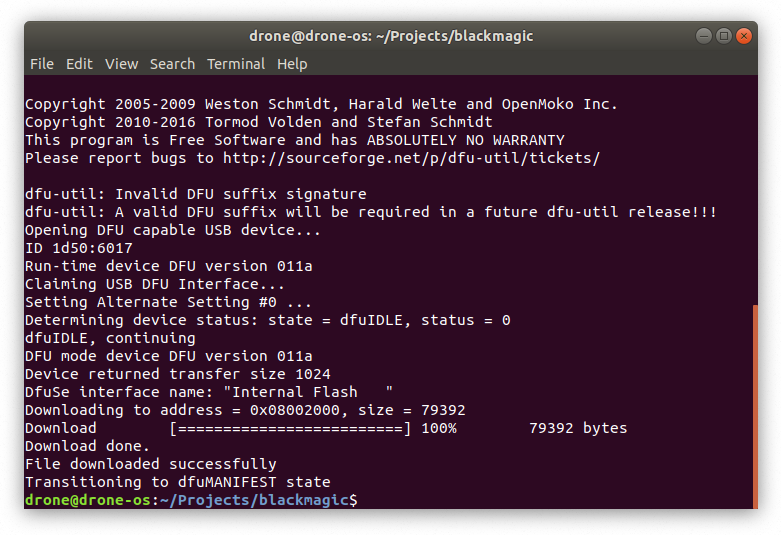
Now we will check that it works. Reconnect the Blue Pill and open a GDB session:
$ gdb-multiarch
At the GDB prompt enter the following commands:
target extended-remote /dev/ttyBmpGdb
monitor version
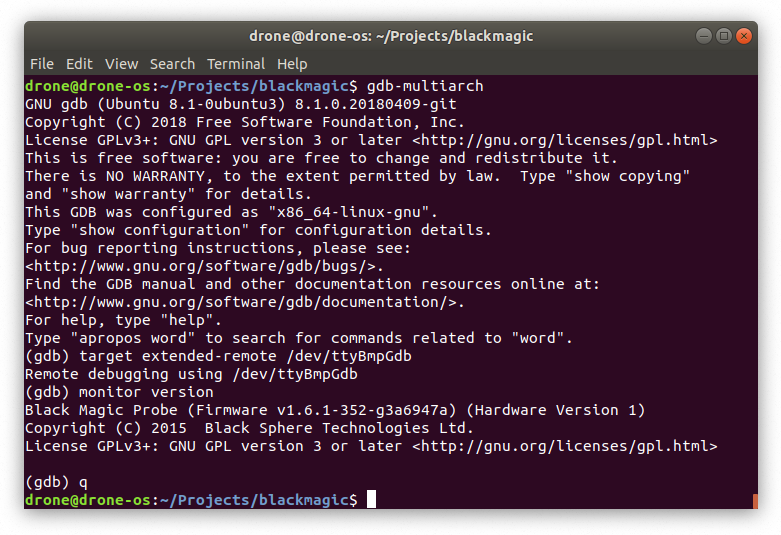
If your output is similar to the output above, congratulations! Now your Blue
Pill is a Black Magic Probe! Next time you need to upgrade the firmware you only
need to repeat the dfu-util command above.
Wiring
Here is a general pin-out description and an example connection with a Blue Pill:
| Black Magic Probe | Function | Blue Pill Target |
|---|---|---|
| GND | GND | GND |
| SWCLK | JTCK/SWCLK | SWCLK |
| SWIO | JTMS/SWDIO | SWIO |
| A15 | JTDI | |
| B3 | JTDO | |
| B4 | JNTRST | R |
| B6 | UART1 TX | |
| B7 | UART1 RX | B3 |
| A3 | UART2 RX (TRACESWO) |
Comparison with Official BMP
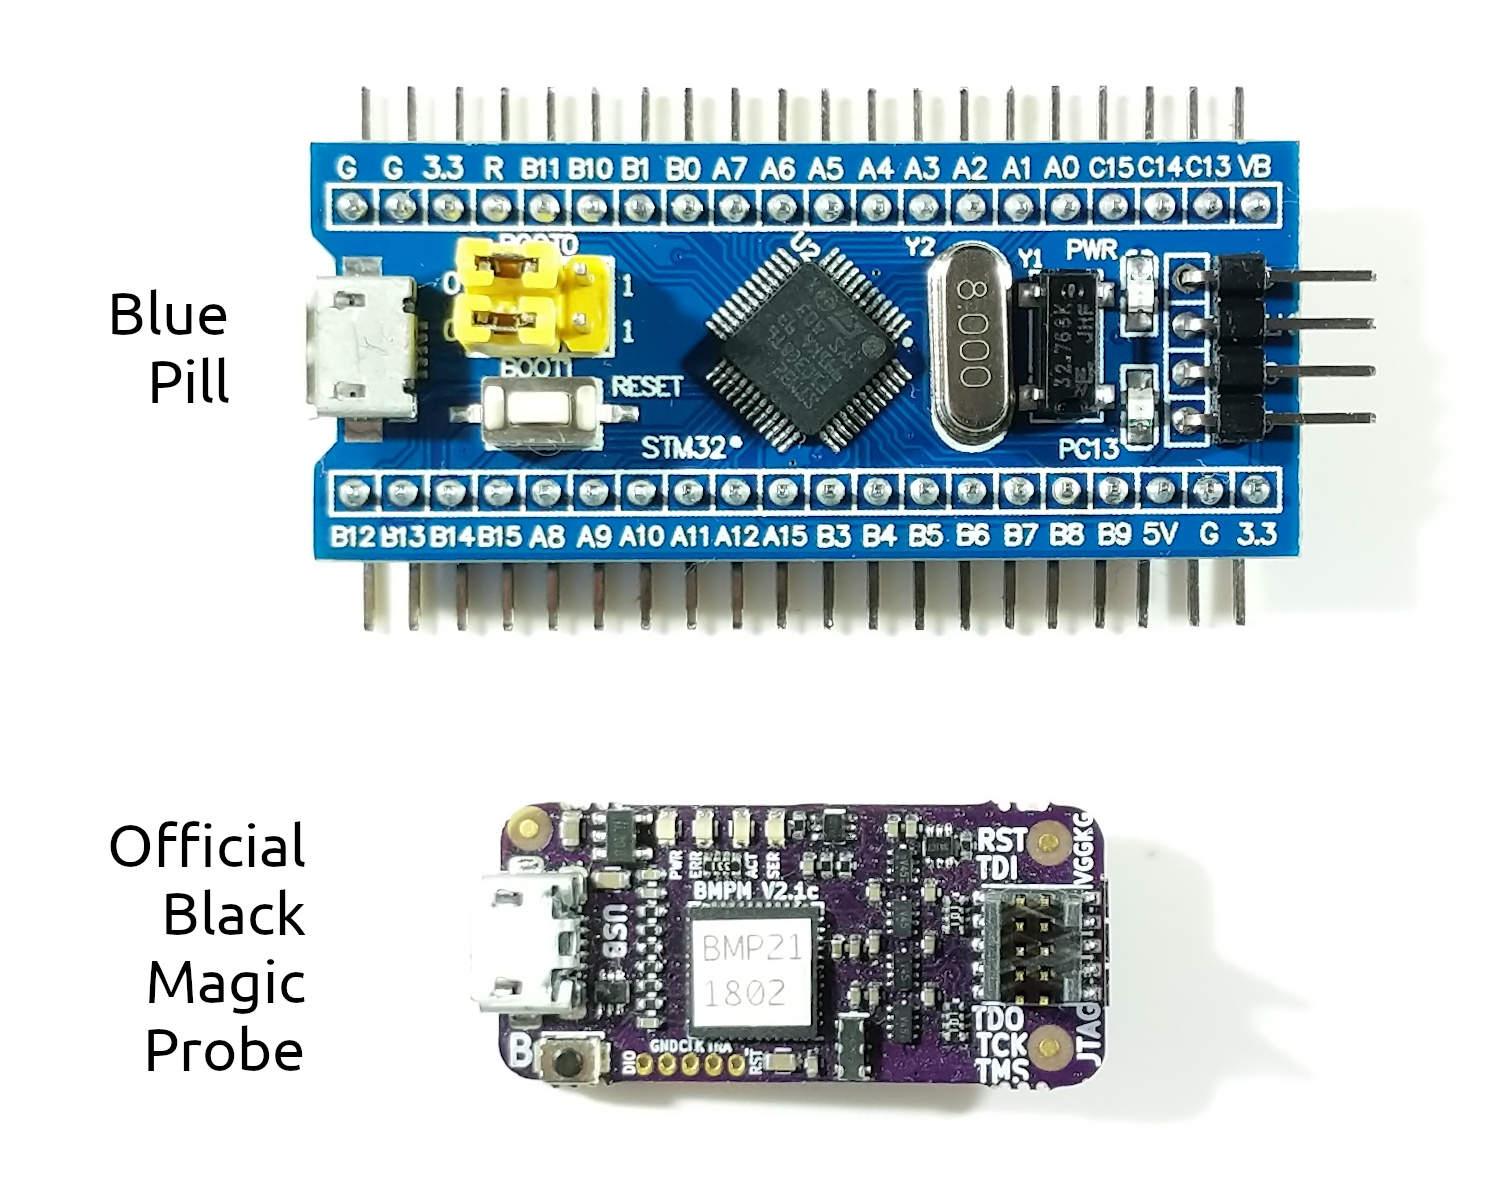
There are a few advantages of the official BMP:
- Has a Cortex Debug connector
- Can power the target
- Can sense the target's voltage
- Has more LEDs
- Has more robust circuitry
These advantages are not critical, however by buying the official hardware you are supporting the BMP project.